The Eocortex Cloud Proxy utility allows to connect the cameras that do not have a VPN access to the cloud or a public address to the Eocortex Cloud system.
Eocortex Cloud Proxy can be downloaded in the personal account area, on the Downloads tab.
In order to connect the cameras via Eocortex Cloud Proxy, it is required to launch the utility on a computer that has access to the Internet and the required cameras, then set up the connections in the utility’s interface.
For connecting the cameras located in different places, any number of Eocortex Cloud Proxy applications can be launched in different subnetworks.
After launching Eocortex Cloud Proxy and upon a successful authorization, a page with the list of cameras will open.
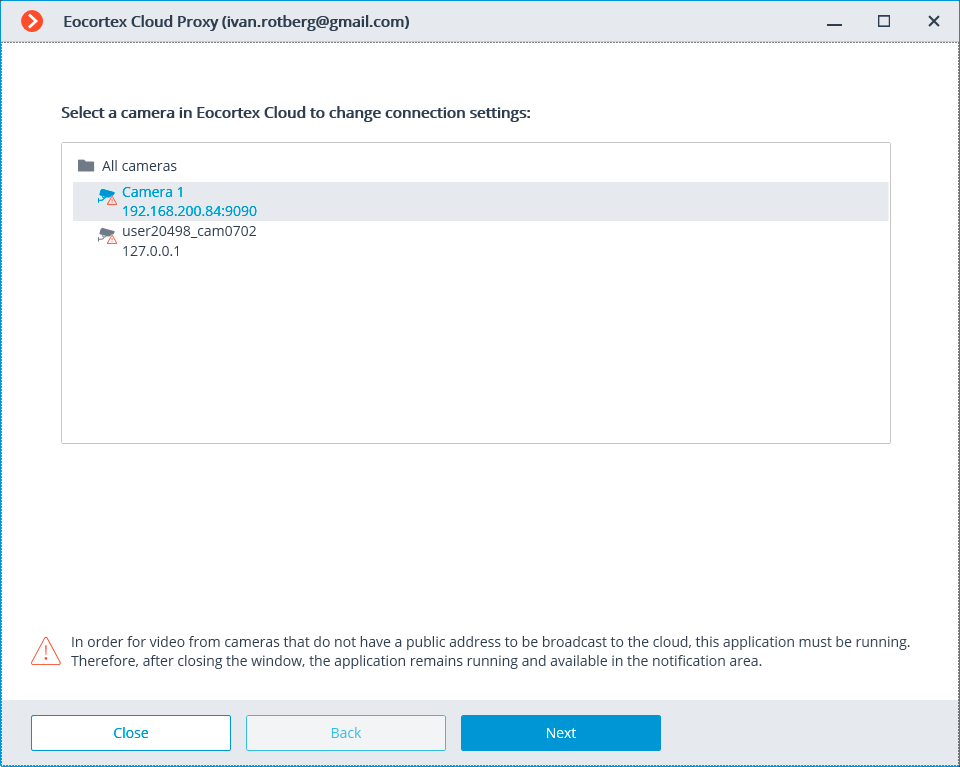
On this page, it is required to select a camera to set up and press Next. A setup mode selection window will open.
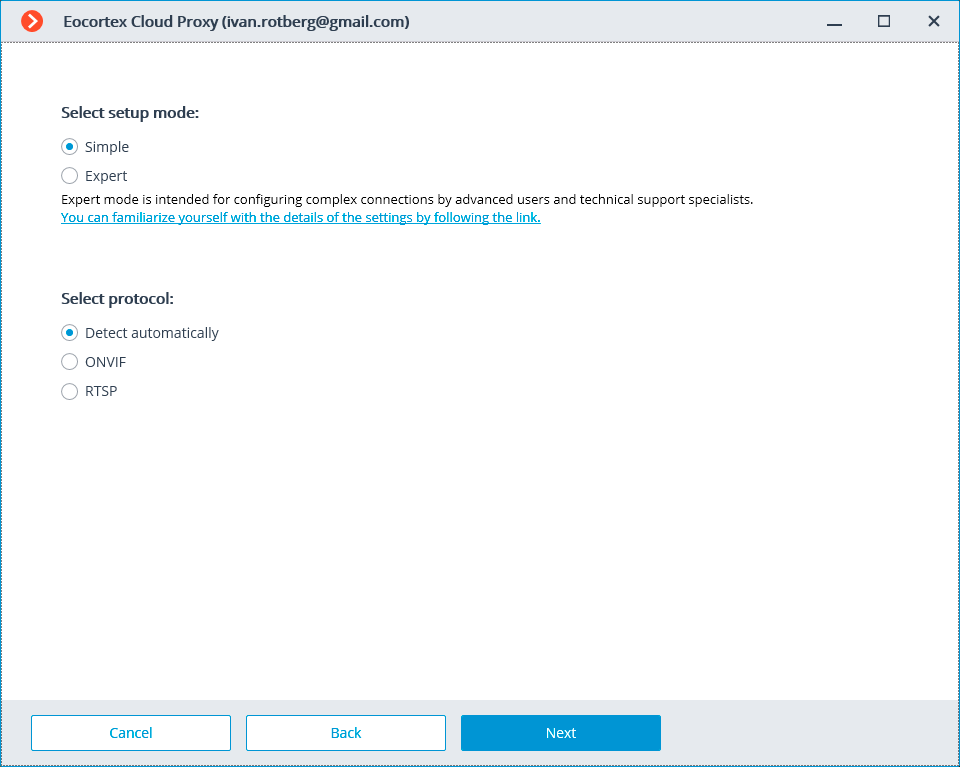
In the simple mode, it is also required to select a camera connection protocol
When selecting ONVIF or RTSP in the simple as well as in the expert mode, pressing the Next button opens the camera connection settings page.
Upon selecting the automatic determination of a connection protocol in the simple mode and pressing Next, the page with the list of cameras found in the network where the utility was launched will open.
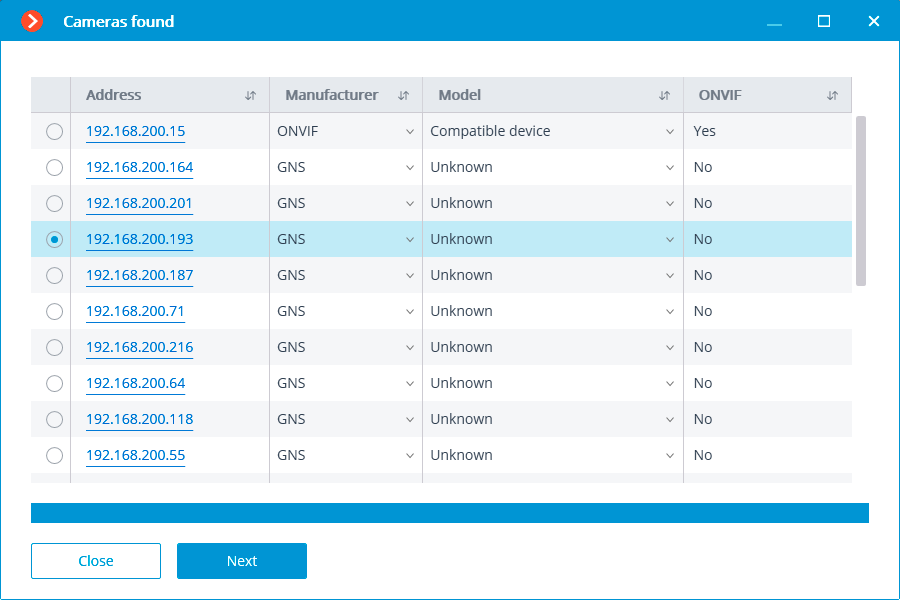
If a manufacturer and a model have been determined successfully for the required camera, select it and press Next, opening the camera connection settings. If the manufacturer or the model of the camera have not been determined, press Close and try to connect the camera using another method; the initial page with the list of cameras will open.
The connection settings page contains the parameters required for connecting the camera to the cloud.
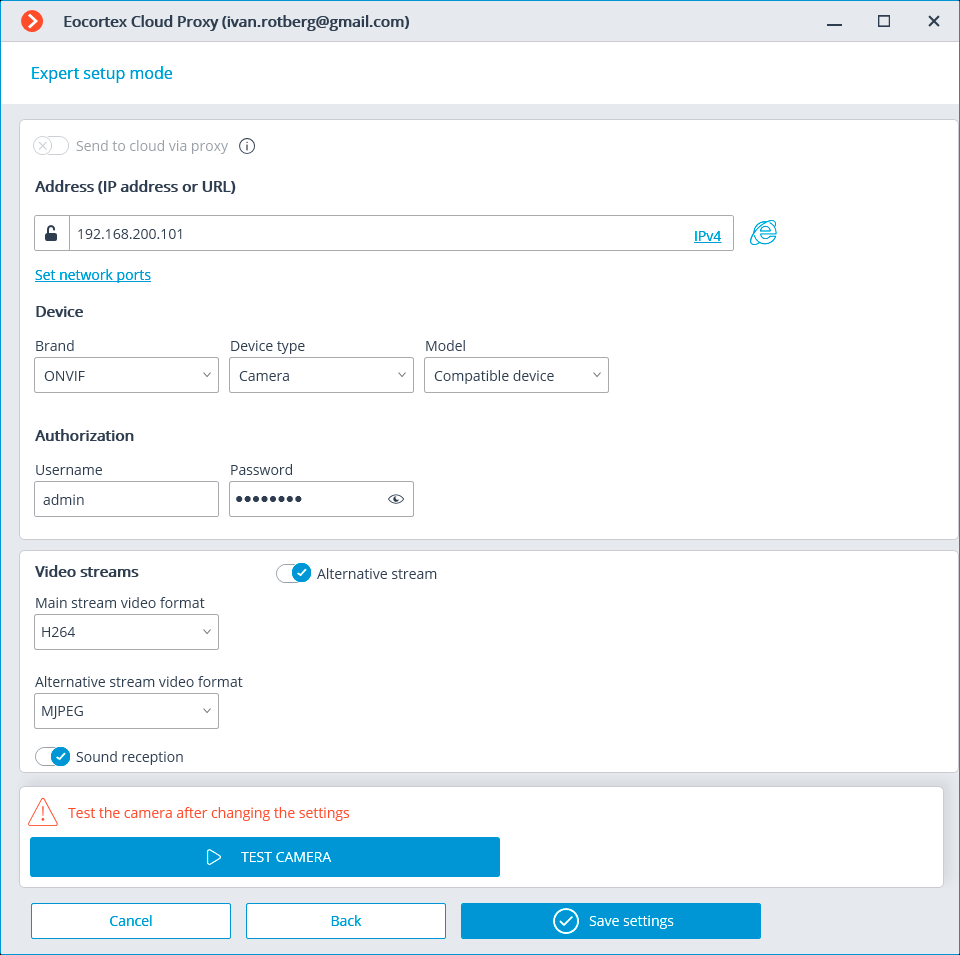
In the Simple mode, a manufacturer and a model will already be indicated, and the default values will be used for the login and password. Also, the address field will be filled in when choosing a camera from the list of the detected cameras.
If the option Send to cloud from proxy has been enabled, the Eocortex Cloud Proxy utility must be launched in order to connect the camera to the Cloud. When this option is disabled, the cloud will connect to the camera by itself using its public address of via its VPN.
In order to connect to the camera, it is required to indicate its Address (IP address or URL). Prefixes like http:// are not required to be specified in this field. In some cases, it may be needed to indicate a port, e.g., 192.168.1.55:8000.
If a camera is being connected via IPv6, select this protocol from the drop-down list in the right part of the Address (IP address or URL) field.
Clicking on the Set network ports link will open the Device network ports window that allows to set ports that are different from those used by default.
It is also required to specify the manufacturer and camera model.
It may be possible to connect the cameras whose manufacturers are not listed using ONVIF, PSIA or RTSP. You can also try to connect such cameras as similar cameras of other manufacturers, if the relevant information is available.
For some manufacturers, base models, series or generations of cameras are indicated instead of particular models.
Apart from the cameras, it is possible to connect video servers by selecting the corresponding device type.
For video servers, it is required to add the number of a channel used for connecting the camera to the particular video server. For most video servers, the channel numbers begin with 0; however, for some models, the numbering starts with 1.
If an authorization is required to connect to a camera, it is needed to set user name and password with full rights of access to the camera.
If required, the reception of the alternative video stream can be enabled in the Video streams group of settings, and the codec can be specified.
Sound reception enables the reception of sound from a camera.
Pressing the Test camera button will start an attempt to connect to the camera with current parameters.
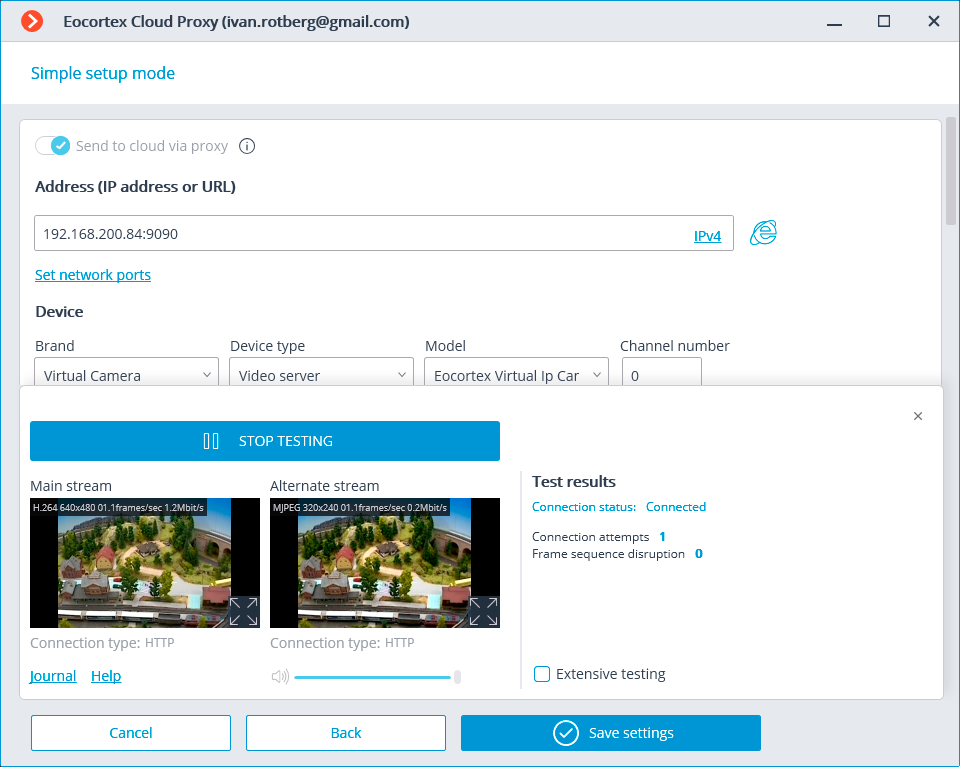
New settings come into effect upon pressing the Save settings button. After that, the page with the list of cameras will open again.
After closing the settings window, the Eocortex Cloud Proxy application will continue to run. To stop it, open the context menu by clicking on the application icon on the task bar, and select the Stop and close item.
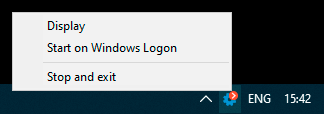
To open the settings window again, select Show in the context menu or double-click on the application icon on the task bar.